Tuesday, October 8, 2019

MAKING OF GREETING CARDS - 2019

For past 30 + years I have been making greeting cards. Earlier around 80 cards now around 40 cards. Every year there is new material or idea.

This year it is this --


Once idea is crystallized, material is brought and work starts around first day of Navratri. It takes around 5 to 6 days to make the cards. I generally post immediately after Dussera so as to receive them around Diwali.


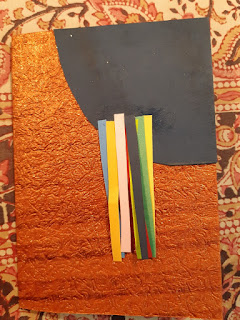
The design should be simple but attractive - 


There need not be different designs, as different families are going to receive them the design can be one for a Diwali season. 


Then carryout dressings and some artistic tweaking - 

Add some outline and underline - Artists will understand the language


Stick the niceties -

Write the salutations, few words to connect and envelop it!

Greeting cards are ready  - write the address, stamp them and dispatch them on time -


Monday, May 6, 2019

Thursday, May 2, 2019

GARDEN BENCH - PART 2

Once the two lap joint supports are over,
 Support is needed to make it rigid when the wooden log is to be seated. The wooden pieces cut to the proper size should be screwed if one wants to make it portable or nailed if it is required to be made permanent garden fixture.


After this finish it with Plainer. 


Wednesday, May 1, 2019

GARDEN BENCH - PART 1

Lets make a Garden bench - Take a half cut coconut tree trunk of suitable length. (in South India we can get them enough). Get suitable wood pieces of size around 3 inches by 2 inches by 24 inches.


Cut them and make half lap joints as these ones.  Plain it with paining machine. 


While making joints use Chisels of half inch or one inch. care should be taken while joining to wood pieces with more than 60 deg angle between them. 


Make two Xsess and finish it with wood filings and fevicol paste

Tuesday, February 19, 2019

DRAGON ART


While in Pokhran I found a root of a tree naturally seasoned and many years old. I was attracted to it for its peculiar shape. Brought it back home and  in my Studio did some cleaning and varnishing - 


Let the Varnish dry up, give one or two coats if it is not shining. Find out appropriate red buttons from the mother's sewing machine box. 


Find suitable twigs of a shrub and paint them red with some oil paint or enamel paint or suitable paint.


 Leave it for drying. Find out sisters old 'Arangetrum' drapery and get hold of artificial braids or if not available then buy it from local fancy shop for throw away price. It is not necessary to have them, there can be other ways to mount the art piece. I have not used them. It can be wall mounted.


Fix the red bead at the appropriate place for depicting the eye of the dragon, fixing the bead instead of painting will give 3 D effect. Drill two holes near the mouth of the dragon so that twigs depicting his tongue can be placed.


 Fix the twigs in the drilled holes. Make sure fevicol is applied so that the twigs remain in the place.


 Select the mounting for this Dragon. It is important. If wall mounted then three nails can do the job. or simple black thread can do the job if it is to be hanged. If it is to be mounted as a show piece then proper base and Y shaped mounts supporting the Dragon can be made, polished or enamel painted and decorated appropriately.


I have kept it simple which is hanging on the wall in the house lobby.